Beranda
/ How To Make Coffee In A Percolator While Camping / Ozark Trail Stainless Steel 8 Cup Coffee Pot Walmart Com Walmart Com : Fill the bottom of the percolator with water, add ground coffee to the top chamber, and heat over a camp stove or fire until the coffee is percolating.
How To Make Coffee In A Percolator While Camping / Ozark Trail Stainless Steel 8 Cup Coffee Pot Walmart Com Walmart Com : Fill the bottom of the percolator with water, add ground coffee to the top chamber, and heat over a camp stove or fire until the coffee is percolating.
Insurance Gas/Electricity Loans Mortgage Attorney Lawyer Donate Conference Call Degree Credit Treatment Software Classes Recovery Trading Rehab Hosting Transfer Cord Blood Claim compensation mesothelioma mesothelioma attorney Houston car accident lawyer moreno valley can you sue a doctor for wrong diagnosis doctorate in security top online doctoral programs in business educational leadership doctoral programs online car accident doctor atlanta car accident doctor atlanta accident attorney rancho Cucamonga truck accident attorney san Antonio ONLINE BUSINESS DEGREE PROGRAMS ACCREDITED online accredited psychology degree masters degree in human resources online public administration masters degree online bitcoin merchant account bitcoin merchant services compare car insurance auto insurance troy mi seo explanation digital marketing degree floridaseo company fitness showrooms stamfordct how to work more efficiently seowordpress tips meaning of seo what is an seo what does an seo do what seo stands for best seotips google seo advice seo steps, The secure cloud-based platform for smart service delivery. Safelink is used by legal, professional and financial services to protect sensitive information, accelerate business processes and increase productivity. Use Safelink to collaborate securely with clients, colleagues and external parties. Safelink has a menu of workspace types with advanced features for dispute resolution, running deals and customised client portal creation. All data is encrypted (at rest and in transit and you retain your own encryption keys. Our titan security framework ensures your data is secure and you even have the option to choose your own data location from Channel Islands, London (UK), Dublin (EU), Australia.
How To Make Coffee In A Percolator While Camping / Ozark Trail Stainless Steel 8 Cup Coffee Pot Walmart Com Walmart Com : Fill the bottom of the percolator with water, add ground coffee to the top chamber, and heat over a camp stove or fire until the coffee is percolating.. While we are willing to forgo a great many things while camping, a good cup of coffee is not one of them. If you don't want to reduce the chances of getting grinds in your coffee, you can put a paper filter in the grinder basket. It then flows out over the coffee chamber into the coffee grounds. Just fill with water, add some coffee, put it on the stove and you're good to go. Once the water boils it will circulate through the coffee until the java is brewed.
Fill it with water, pouring about eight ounces of water for every cup of coffee you want. How to make coffee with a camping percolator. For those of us unfamiliar with percolation, the process is pretty simple. Fill the bottom of the percolator with water, add ground coffee to the top chamber, and heat over a camp stove or fire until the coffee is percolating. Using a percolator to make camp coffee.
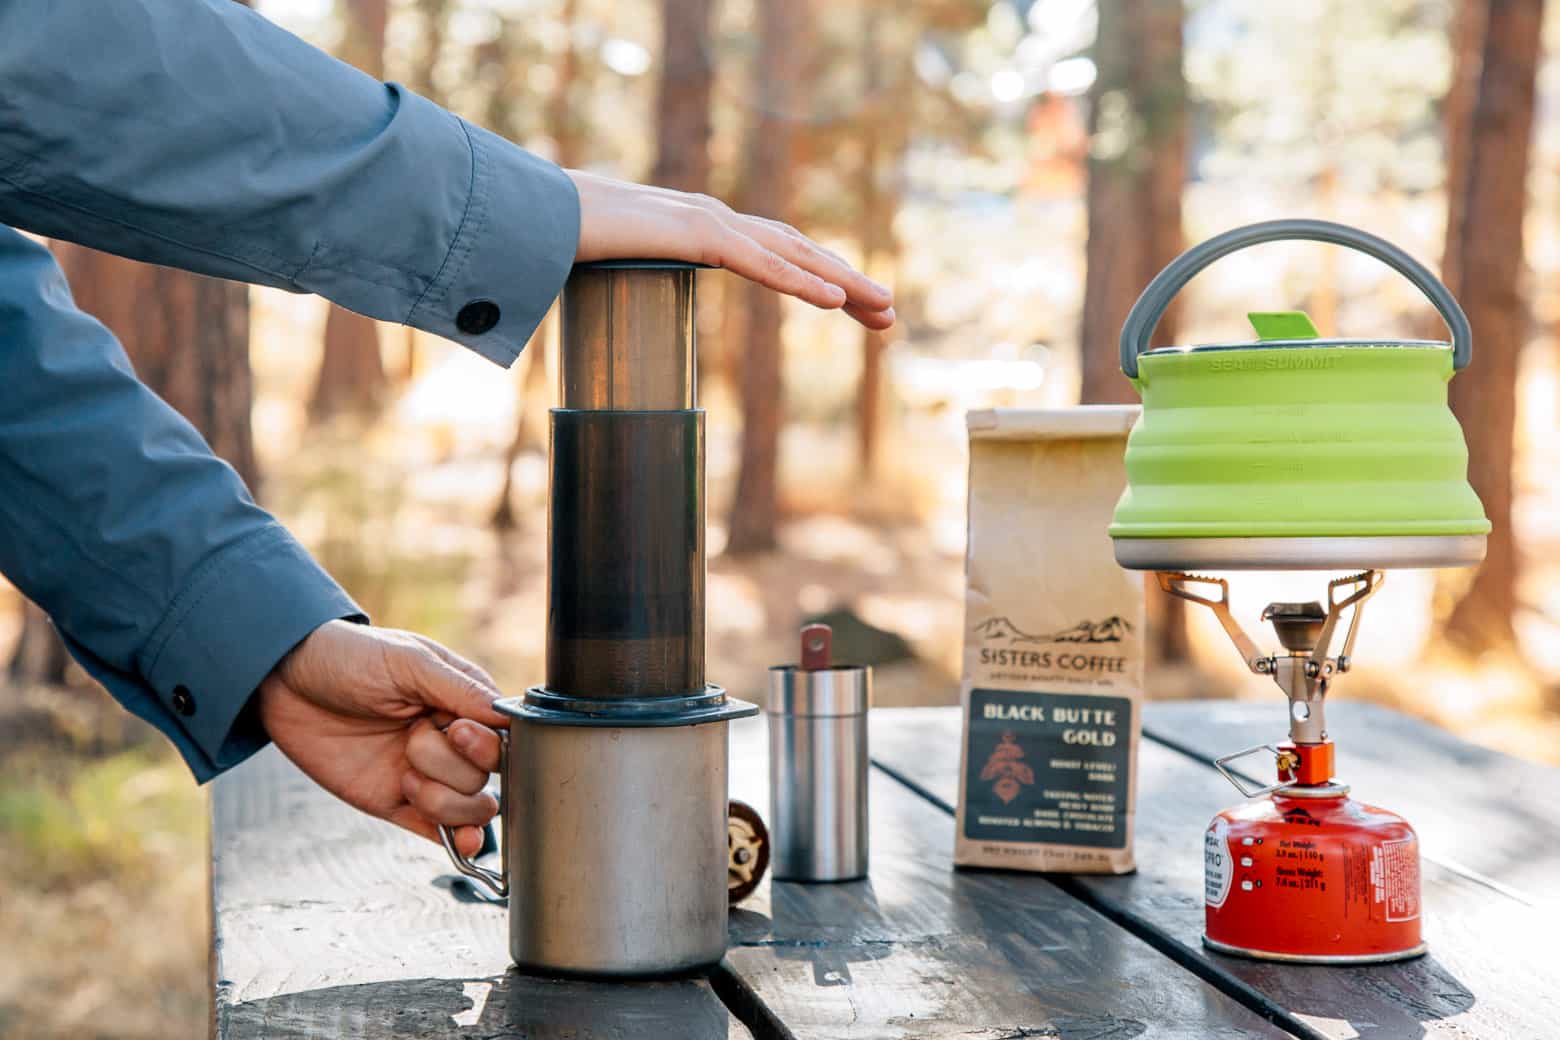
How To Make Amazing Camp Coffee With An Aeropress Coffee Maker Fresh Off The Grid from www.freshoffthegrid.com You must add coarse coffee grounds to the container. Remember, the ratio is two tablespoons of coffee per cup. Here are a few of the many, many, ways to make coffee while camping. You will probably need to wait about 10 minutes for the coffee to be ready. Making coffee with a percolator that has a bubble lid, method 1: In order to make a good cup of coffee using a camping coffee percolator, a person must brew their coffee for around 15 minutes or until the lid starts to percolate. Coffee percolators are easy to use and cut down on the amount of grounds that sneak their way into your mug via the cowboy method. Pour half of the water that is required into the press.
Remember, the ratio is two tablespoons of coffee per cup.
Once the water boils it will circulate through the coffee until the java is brewed. A stovetop percolator can be used on a portable gas stove or even over a campfire. The water runs through the grinds and recycles through the percolator, resulting in a boiling hot pot of coffee. Making coffee in a percolator camping pot is easy to do when you add in the right amount of water. Disassemble the coffee percolator and fill with cold water. In order to make a good cup of coffee using a camping coffee percolator, a person must brew their coffee for around 15 minutes or until the lid starts to percolate. Heat the percolator over the camp stove or fire and brew to your liking. When camping, whether it's a campfire or a propane stove, the heat source heats water in the bottom. If you don't want to reduce the chances of getting grinds in your coffee, you can put a paper filter in the grinder basket. A percolator has an aluminum tube that runs up that ends with a metal basket, where you pack your coffee grounds. Give the water 30 seconds to cool. Sweet, sweet coffee, the lifeblood of outdoor adventurers and campers everywhere. Fill the percolator with the amount of water needed for the amount of coffee you want to make.
You should only put in enough water in a pot to make the amount of coffee that you will consume in a setting. Heat the percolator over the camp stove or fire and brew to your liking. As water boils inside the kettle, it's pushed up a tube and sprinkled over your coffee grounds in the basket. Fill the percolator with water to the designated 'fill line' add coffee to the basket, using a filter if applicable close the basket lid Set it on the heat source, and bring the water to a boil.
Coffee Percolator Wikipedia from upload.wikimedia.org Next, fill the basket with coffee grinds. The cowboy method of coffee making. Fill the percolator below the basket insert. Fill the percolator with the amount of water needed for the amount of coffee you want to make. Open the front lid and add ground coffee to the filtered basket, then close lid. Give the water 30 seconds to cool. It's a simple and effective way to brew coffee and you even get some percolators specifically designed for use over a campfire. Using a coffee or cult brew bag.
Put the coffee grounds in the provided filter and place it into the coffee percolator pot.
First, fill the percolator with water and coffee grounds and then place it over a heat source. Fill the percolator with the amount of water needed for the amount of coffee you want to make. Fill the percolator with water to the designated 'fill line' add coffee to the basket, using a filter if applicable close the basket lid A percolator works by forcing boiling water through a long stem into the brew basket where the coffee grounds go. As the water heats up, it pushes the tube and infuses the coffee grounds. While we are willing to forgo a great many things while camping, a good cup of coffee is not one of them. Making coffee in a percolator camping pot is easy to do when you add in the right amount of water. In just a few short minutes, you will have a lovely cup of coffee. The water runs through the grinds and recycles through the percolator, resulting in a boiling hot pot of coffee. Pour cold water into the percolator pot to the halfway point before filling the coffee filter with grounds to the halfway mark. Open the front lid and add ground coffee to the filtered basket, then close lid. Before you can add your coffee to the basket, you'll need to attach the basket to the stem. For me, coffee is a daily ritual, and camping without a hand.
Post contents show 10 ways to make coffee while camping. Make an instant coffee with a good coffee brand (alpine start, voila instant coffee), etc. Pour half of the water that is required into the press. Disassemble the coffee percolator and fill with cold water. Fill the percolator below the basket insert.
The Ultimate Guide To Camp Coffee Our Favorite Ways To Brew Coffee While Camping Camping Coffee Camping Coffee Maker Cowboy Coffee from i.pinimg.com If you don't want to reduce the chances of getting grinds in your coffee, you can put a paper filter in the grinder basket. Watch more coffee recipes & tips videos: Fill the percolator below the basket insert. A stovetop percolator can be used on a portable gas stove or even over a campfire. Next, fill the basket with coffee grinds. Open the front lid and add ground coffee to the filtered basket, then close lid. Remember, coffee made in a percolator will be hotter than that made in a coffee maker, and don't forget to strain the grounds out of the coffee. Fill the percolator with the amount of water needed for the amount of coffee you want to make.
Making coffee in a percolator camping pot is easy to do when you add in the right amount of water.
In just a few short minutes, you will have a lovely cup of coffee. Before you can add your coffee to the basket, you'll need to attach the basket to the stem. Fill it with water, pouring about eight ounces of water for every cup of coffee you want. Fill the bottom of the percolator with water, add ground coffee to the top chamber, and heat over a camp stove or fire until the coffee is percolating. While we are willing to forgo a great many things while camping, a good cup of coffee is not one of them. How to make coffee in a percolator while camping. Pour half of the water that is required into the press. Percolator coffee makers work by sending boiling water up through a long stem into a brew basket that holds the coffee grinds. To make coffee using a percolator, you need to remove the apparatus and fill the percolator with cold water. Heat the percolator over the camp stove or fire and brew to your liking. When camping, whether it's a campfire or a propane stove, the heat source heats water in the bottom. Allow the wood to burn until it becomes glowing coals, so it will be easy to brew with the percolator. Use the lid to cover the filter and put the filter on a stand before putting the stand and percolator into a pot of water.